


Mixing Rhythm and Lead – Jimi Hendrix Style Embellishments
As guitar players, we spend a lot of time dividing the way we play into two categories, rhythm and lead. But, what if there was a way to blur the line between these two? Jimi Hendrix certainly though it was possible.
In this lesson, you’re going to learn a new way to map out chord progressions which combines chords from the key with some lead lines and embellishments to link the chords.
This lesson is all in the key of A Major, so you’ll need to know how to construct chord progressions in a major key and how the Major Pentatonic works, there are lessons on the Blackstar channel covering these two topics.
Before you start working on the pre-prepared piece, you have to reimagine your major and minor barre chords as triad chords that you play with your thumb in the bass.
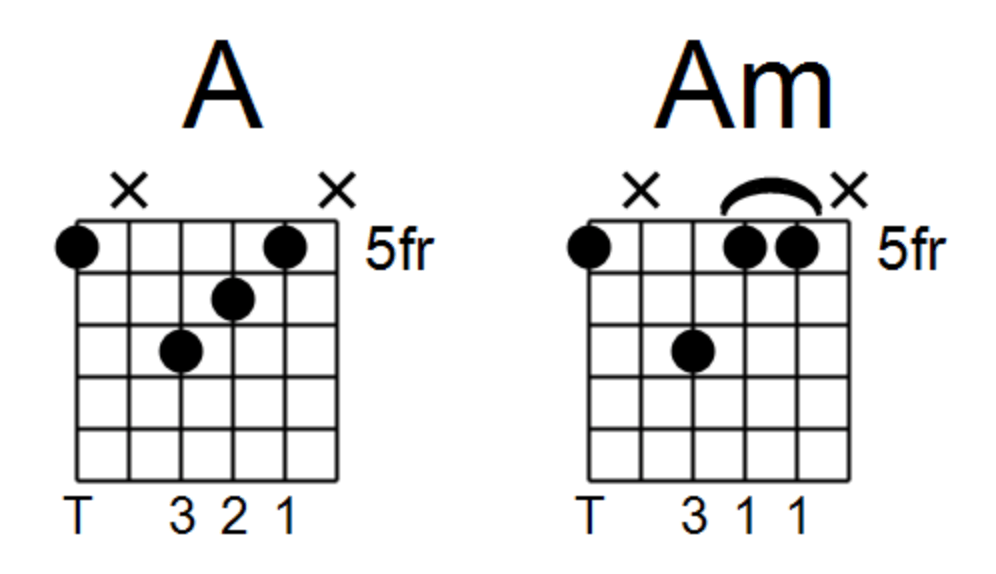
The triad is the major or minor chord in it’s most pure form. It’s the 1, the 3 (Or b3 for minor) and 5 notes played on the D, G and B strings. Hendrix would always play chords this way with the thumb playing the root on the Low E. This frees up your little finger to embellish the chord and it makes it easier to jump in and out of lead phrases.
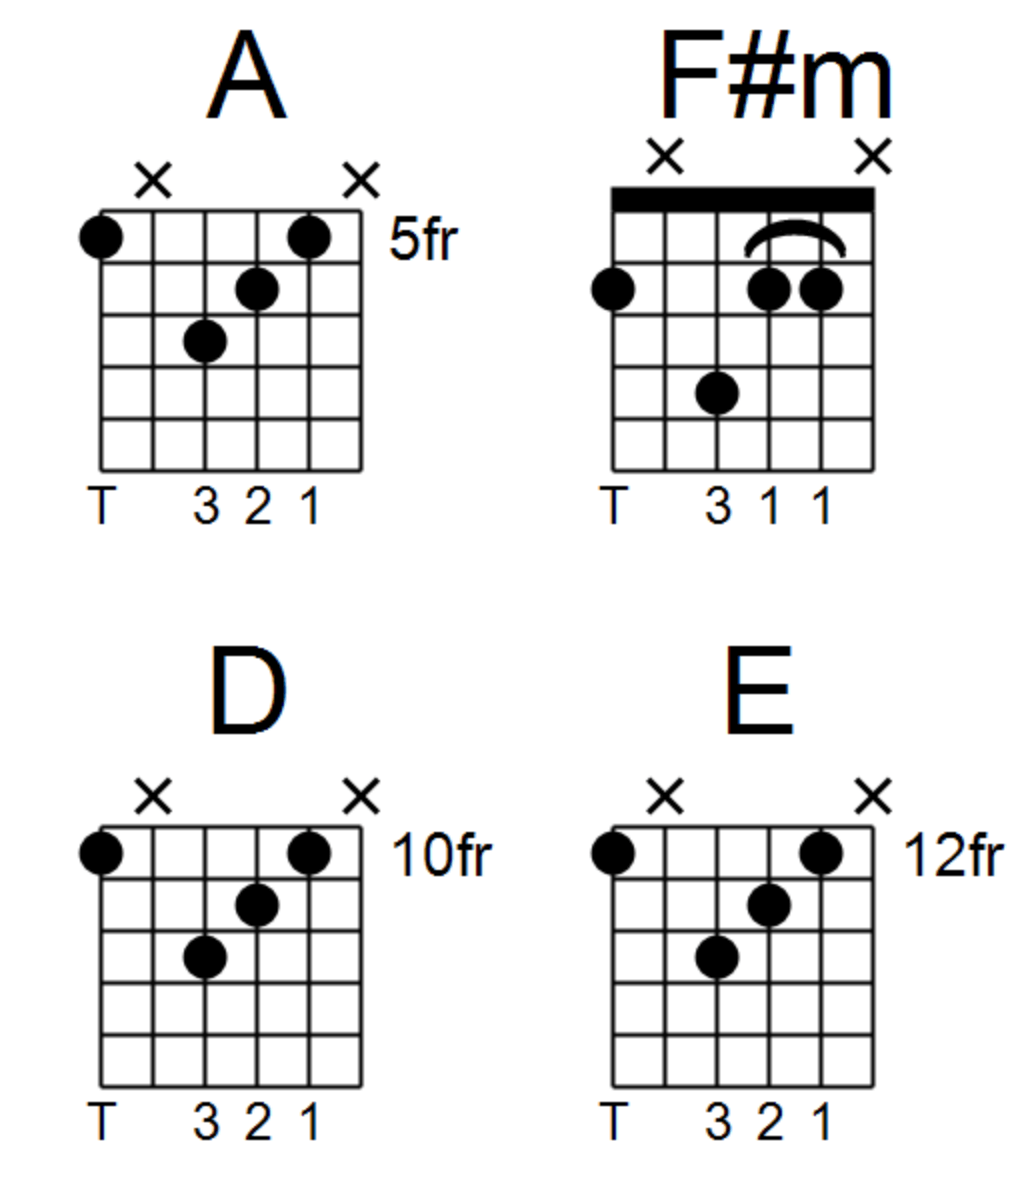
The four chords you’ll be using in this lesson from the key of A Major are A, F#m, D and E. This is the 1, 6, 4 and 5 chord of the key.
Once you’ve learnt the chord shapes, it’s time to start adding the lead lines. We’ll break this down in 2 bar phrases before putting it all together again.
The first 2 bars is made of an A and an F#m chord. The first half of each bar is just setting the chord up. Play a pair of root notes, hit the chord then another pair of quick root notes to set up the lead line.
The A chord sits in the first shape of the Major Pentatonic, so this descending double stop line comes from there. The F#m sits in the fifth shape. This F#m chord line might look like a typical pentatonic idea you’d play in a minor key. It extends back to the first shape and ends on an A note. If you aim to hit this A note with your index finger, you can easily walk yourself back to your A chord.
Repeat this twice.

The next section alternates between a D and an E chord. This section actually sets up each chord the same way, but the back half of each bar is a strummed section where you fret a note with your little finger on the B string, 2 frets higher.
The D chord sits within the third major pentatonic shape and the E chord within the fourth, it just so happens this note is present in both shapes.
You can use hammer ons and pull offs to add some fluidity to the transition.
On the second repeat, instead of sticking on the E chord and adding an extra note, it shifts to a descending double stop line from the upper end of the fourth shape of the major pentatonic scale before finishing on an A note (14th fret of the G)

Once you’ve gone through the two sections you can start to put this together as a full progression. Take your time jumping between the chords and the lead lines, this takes a little practise to get right. Start slow and work your speed up over time.
Here is the full thing:

You can apply this concept to your playing in all areas. If you’re playing a minor key progression, use the same system but apply the chord shapes to minor pentatonics rather than major.
This is a great way to break out of the box of playing only rhythm, or only lead guitar. Think of the guitar in a more fluid way and allow yourself to get creative with scales and chords together.